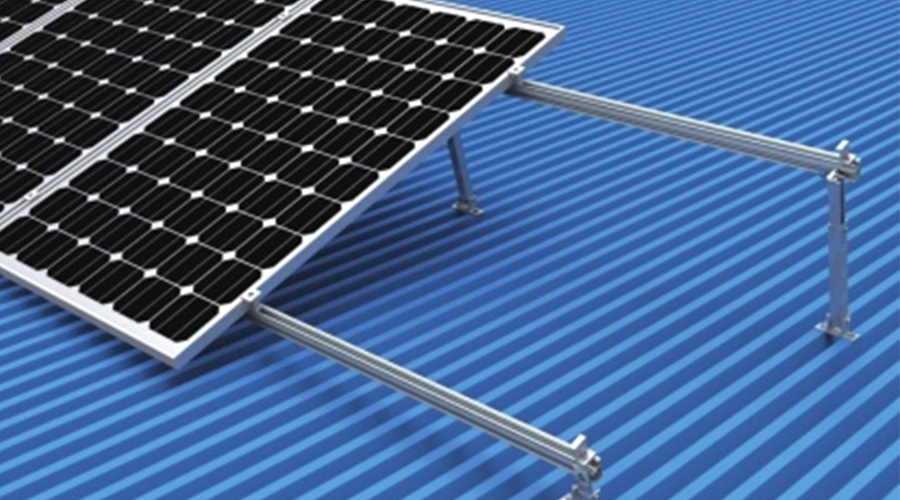
A solar array is truly only as reliable as the framework securing it. While the photovoltaic panels generate the desired financial return on investment, the mounting hardware dictates structural integrity, severe weather resistance, and long-term project liability. Selecting the wrong racking framework routinely leads to devastating roof leaks, voided manufacturer warranties, skyrocketing labor costs, and frustrating failures to pass local inspections. Too often, property owners focus entirely on panel wattage while treating the structural base as a cheap afterthought.
This comprehensive guide breaks down the essential technical frameworks required to evaluate and specify a Solar Panel Mounting System that perfectly balances upfront component costs, field installation efficiency, and 25-year structural compliance. You will learn exactly how to match mounting hardware to your specific roof typology. We will also explore how to navigate complex local building codes and optimize crew labor efficiency for a seamless project execution.
Key Takeaways
Solar mounting hardware typically accounts for roughly 10% of total system hardware costs, but heavily influences 100% of installation labor time and long-term roof safety.
The choice between railed and rail-less systems hinges on roof consistency, climate loads, and the installer's required alignment precision.
Roof-mounted setups demand strict adherence to dead load limits and fire codes (e.g., IBC 3-foot clearances), whereas ground mounts prioritize soil stability and maximum tilt efficiency.
Optimizing for installer efficiency—such as choosing systems with long span capabilities and unified single-tool hardware—drastically reduces roof penetrations and labor hours.
Framing the Baseline: Rooftop vs. Ground-Mounted Architectures
You must define your macro-level deployment strategy before selecting any specific hardware. This initial decision depends heavily on your available footprint and desired energy yield requirements. Both primary deployment architectures offer distinct structural advantages and logistical constraints.
Rooftop Systems: Maximizing Existing Assets
Rooftop setups maximize existing real estate perfectly. They leverage unused overhead space efficiently. They also eliminate expensive underground trenching requirements. You generally avoid complex land-use permitting. Homeowners associations rarely block these low-profile installations. You can tie them into your main electrical panel quickly.
However, roofs impose strict physical constraints. You must work within existing dimensions. You cannot alter the existing roof azimuth or pitch easily. Structural weight limits strictly dictate your equipment choices. You must ensure the building can support the added dead load. You must also maintain adequate thermal gaps below the modules. Without proper airflow underneath, photovoltaic panels suffer accelerated heat degradation over time.
Ground-Mounted Systems: Optimizing for Yield and Scalability
Ground-mounted arrays optimize purely for maximum energy yield and long-term scalability. They remain completely independent of your roof condition. You can face them perfectly south regardless of your home's orientation. You can customize the tilt angle for optimal seasonal sun exposure. These setups routinely achieve 8-10% higher energy yields than identical rooftop arrays.
Yet, they bring their own distinct site constraints. You must dig extensive trenches for electrical conduit. You often need costly geotechnical soil assessments before digging. They require heavy concrete footings or deep steel helical piles. Ultimately, they occupy valuable, usable land on your property. They also demand regular landscape maintenance to prevent shading from growing weeds.
Deployment Strategy Chart
Deployment Type | Primary Advantage | Major Constraint | Best Use Case |
Sloped Rooftop | Utilizes existing dead space | Confined by existing azimuth/tilt | Urban and suburban residential homes |
Flat Rooftop | Easy access, invisible from street | Strict dead load weight limits | Commercial and industrial buildings |
Ground-Mount | Optimal tilt and southern orientation | Occupies usable land, requires trenching | Rural properties with high energy demands |

Matching the Solar Panel Mounting System to Roof Typology
We must evaluate structural compatibility thoroughly. Penetration risks vary wildly based on your specific roofing material. Using the wrong attachment bracket causes catastrophic water damage over a 25-year lifespan.
Sloped Residential & Commercial Roofs
Asphalt shingle roofs remain the absolute industry standard. They require precise lag bolt penetrations secured directly into structural wooden rafters. Installers must pair these bolts with high-quality EPDM rubber flashing. This specialized rubber stops water intrusion completely. It expands and contracts naturally alongside the roof during temperature swings.
Tile roofs demand incredibly high labor intensity. Whether Spanish clay or standard concrete, tiles break easily under human weight. Installers use specialized tile hooks. They carefully slide these metal hooks beneath the tiles. This method fastens to the roof deck while preventing tile breakage. Broken tiles drive up installation costs rapidly. They also create massive long-term replacement liabilities.
Standing seam metal roofs offer the most non-invasive mounting option available. They utilize specialized aluminum seam clamps. These clamps secure the array tightly without ever penetrating the metal roof deck. They eliminate leak risks entirely. Installers torque these clamps to precise specifications. This ensures the panels never slide during heavy wind events.
Flat Commercial Roofs
Flat commercial roofs require entirely different engineering approaches. Ballasted systems use heavy concrete block weights instead of invasive roof penetrations. They hold the array down purely using gravity. You need strict structural engineering sign-off here. The commercial building must safely support this massive additional dead load without sagging.
Mechanically anchored systems step in when buildings fail these crucial weight checks. Installers also use them in severe high-wind zones. Here, violent aerodynamic uplift forces mandate direct structural ties. Installers bolt the frames directly into the roof joists. They then seal the penetrations using commercial-grade liquid flashing.
Best Practices for Roof Attachments
Always locate and drill directly into the dead center of the structural rafter.
Never rely purely on chemical sealants; always use mechanical metal flashing.
Consult a structural engineer before adding ballasted blocks to any aging commercial roof.
Railed vs. Rail-less Mounting Systems: Installation Realities
You must evaluate the two dominant rooftop hardware architectures carefully. Your choice hinges on logistics, aesthetics, and engineering trade-offs.
Railed Systems (The Standard)
Railed systems remain the standard baseline across the industry. Long extruded aluminum rails attach securely to the roof mounts. Installers then clamp the solar panels directly onto these continuous horizontal rails.
They forgive uneven roof planes beautifully. If your roof bows slightly, the rigid rail keeps the solar panels perfectly straight. They distribute mechanical stress exceptionally well across multiple anchor points. This helps tremendously during heavy wind and deep snow events. Built-in channels make electrical wire management simple and clean.
However, they present notable logistical drawbacks. They demand heavier shipping logistics due to their length. Crews must carry long metal pieces up ladders. They often require on-site cutting. This generates metal shavings and slows down the installation pacing.
Rail-less Systems (The Minimalist Approach)
Rail-less systems take a much more minimalist approach. The mounting hardware attaches directly to the roof anchors. They utilize the rigid aluminum frames of the solar panels themselves as the primary structural connection.
You benefit from significantly lower shipping costs. You buy fewer raw materials overall. The finished product looks highly aesthetic. It sits very low to the roof deck.
The drawbacks are notably steep. You need an exceptionally flat roof surface. New asphalt shingles work best for this. You also need highly skilled installers. Alignment errors compound rapidly across the roof. You lack a continuous horizontal rail to physically "true" the row. If one panel sits slightly crooked, the entire array becomes visibly misaligned.
Core Evaluation Criteria for Engineering and Compliance
Every project decision-maker must clear specific structural and regulatory hurdles. Failing to meet these compliance standards prevents utility interconnection and voids insurance policies.
Wind and Snow Load Ratings
Wind and snow load ratings dictate baseline survival. Manufacturers must certify their mounting systems to your local climatic extremes. High-wind zones force closer attachment spacing. Installers must place roof anchors every two feet instead of every four feet. Extreme weather environments require heavier-gauge aluminum or rugged galvanized steel components.
Building Codes and Fire Safety (IBC/NEC)
Building codes and fire safety regulations govern your physical layout directly. Your structural design must accommodate International Building Code (IBC) mandates seamlessly. Firefighters need safe access during active house emergencies. The IBC requires a mandatory 3-foot clearance path along roof ridges and valleys. You cannot cover your entire roof edge-to-edge. Electrical wiring must meet the National Electrical Code (NEC). Wiring cannot touch the rough roofing material directly.
Material Durability & Galvanic Corrosion
Material durability prevents premature catastrophic failures. Always specify anodized aluminum for lightweight residential roof attachments. It naturally resists long-term moisture corrosion. Use heavy hot-dipped galvanized steel for large ground mounts.
You must actively avoid placing dissimilar metals in direct contact. If a bare copper grounding wire touches an untreated aluminum rail, galvanic corrosion accelerates rapidly. The metal literally eats itself away. This destroys the structural integrity of your system within just a few years. Always use stainless steel separation washers between conflicting metals.
Thermal Management
Thermal management plays a crucial role in module longevity. A system sitting completely flush against a roof traps dangerous heat. It lacks an essential cooling air gap. This causes panel overheating during summer months. It pushes the standard 0.4-0.5% annual degradation rate much higher. Ensure your attachment brackets provide adequate vertical ventilation clearance. A gap of four to six inches usually provides optimal convective cooling.
Analyzing Total Cost of Ownership and Labor Efficiency
Buying the absolute cheapest mounting bracket frequently guarantees the most expensive final installation. You must look beyond the initial purchase order. You must evaluate the total labor impact of your hardware choice.
The 10% Hardware Benchmark
The 10% hardware benchmark is famous in this industry. Framing and mounting components typically represent roughly 10% of your total solar hardware costs. However, they easily control the vast majority of your field labor time. A cheap, poorly engineered solar mounting system burns through expensive labor hours. Difficult hardware frustrates crews and leads to careless installation mistakes.
Span Capability
Span capability dramatically impacts installation speed. High-quality rails safely handle much longer spans between roof attachments. Fewer necessary attachments mean installers drill fewer total holes into your roof deck. This immediately lowers your long-term water leak liability. It drastically cuts layout and measuring time. Crews spend more time dropping panels and less time hunting for wooden rafters.
Hardware Simplicity (Tool Count)
Hardware simplicity changes the labor equation entirely. Advanced racking systems unify all bolt and fastener sizes. Crews secure the entire array using a single socket size. Nobody wastes valuable time switching tools on a hot, pitched roof. When every nut and bolt uses a 1/2-inch socket, the installation pacing accelerates significantly. Workers make fewer torque errors when using a standardized toolset.
Integrated Wire Management
Integrated wire management eliminates messy, afterthought solutions. Premium systems feature smartly built-in cable trays. Installers simply snap the loose wires inside the rails. They do not need hundreds of brittle plastic zip ties. This protects critical wires from harsh UV rot. It reduces long-term maintenance truck rollouts. It also speeds up final electrical inspection approvals. Inspectors love neatly managed, fully enclosed wiring systems.
Labor Efficiency Checklist
Verify the system requires only one or two socket sizes.
Check the maximum allowable span distance between roof attachments.
Ensure the system includes dedicated clips or channels for wire management.
Confirm the hardware arrives pre-assembled where possible.
Conclusion
Choosing a reliable solar mounting system is fundamentally a structural engineering decision masquerading as a simple purchasing choice. Whether you are carefully navigating tight dead loads on a flat commercial building or actively mitigating leak risks on residential asphalt shingles, the mount entirely dictates the system's longevity. You cannot afford to compromise on structural integrity to save a fraction on upfront costs.
Your immediate next steps should prioritize safety and site-specific data. Prioritize a professional roof structural assessment before ordering any parts. Consult directly with a licensed EPC or experienced installer. Demand that they provide transparent structural load calculations. Once you confirm your roof's physical capacity, you can confidently select the final hardware manufacturer that best aligns with your budget and efficiency goals.
FAQ
Q: How much does a solar panel mounting system cost?
A: Mounting hardware usually sits at 8-12% of the total system equipment cost. This translates to roughly $800 to $1,200 for a standard residential 6kW system. Keep in mind this figure excludes the labor required to install it. Investing slightly more in premium hardware often saves you hundreds of dollars in reduced installation labor.
Q: How long do solar panel mounts last?
A: High-quality anodized aluminum and stainless steel racking systems are specifically designed to match or exceed the 25-year lifespan of the solar panels themselves. They resist rust, corrosion, and extreme weather degradation. Routine inspections every five years ensure the torque on the bolts remains secure against wind vibrations.
Q: Does installing roof mounts void my roof warranty?
A: It certainly can, unless you hire a certified professional. They must use approved flashing techniques and appropriate roofing sealants. These techniques must strictly comply with your specific roofing manufacturer's guidelines. Always review your existing roof warranty documentation and hire licensed installers who guarantee their penetration work against future leaks.