Solar hardware accounts for a mere 3% to 10% of total project costs. Yet, it bears 100% of the responsibility for maintaining a 25-year structural lifespan and protecting roof integrity. Substandard racking choices frequently lead to disaster. You might see micro-cracks in costly solar panels, voided commercial roof warranties, or catastrophic wind-shear failures during major storms.
This guide bypasses surface-level definitions. Instead, we provide project managers, EPCs, and commercial buyers with an evidence-based evaluation framework. You will learn how to select a reliable solar mounting system balancing CAPEX efficiency against strict regulatory compliance. We explore roof-specific attachment methodologies, material engineering standards, load-bearing compliance, and total cost optimization strategies.
Key Takeaways
Roof-Specific Deployment: Selecting the correct attachment methodology (e.g., non-penetrating clamps for standing seam vs. ballasted flat roof arrays) is the primary driver of long-term system health.
Material Engineering: Advanced alloys like AL6005-T5 and Zinc-Aluminum-Magnesium (ZAM) steel offer necessary corrosion resistance, requiring exact thickness minimums (e.g., ≥ 65μm for galvanized steel).
Compliance & Load Bearing: Quality roof solar mounting systems add a negligible 2.5–2.7 lbs/sq ft of dead load but must be engineered to withstand 90–120 mph wind uplifts and strict IBC fire clearances.
TCO Optimization: Innovations like rail-less systems and pre-assembled components are reducing installation labor times by 30-40%, directly improving project ROI.
Matching the Solar Panel Mounting System to Roof Architecture
The structural makeup of any building dictates the necessary mounting hardware. Improper pairing is the leading cause of premature roof degradation and moisture leaks. You must treat the roof and the Solar Panel Mounting System as a single integrated ecosystem.
Standing Seam Metal Roofs
Standing seam roofs represent the ideal scenario for long-term solar longevity. Their lifespan often matches or exceeds the 25-year life of the solar modules.
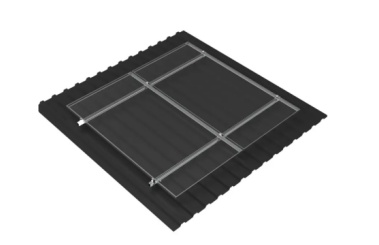
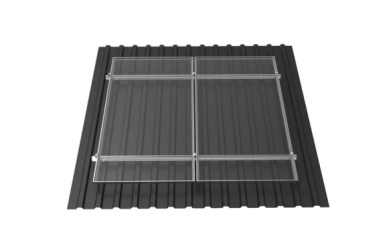
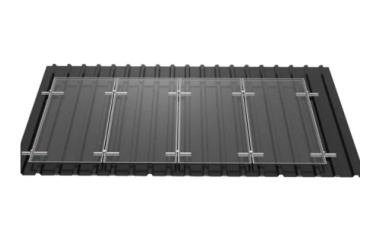
Evaluation: You must use U-type zero-penetration clamps. These specialized clamps grip the raised metal seam directly.
Advantage: This method preserves the roof's waterproofing completely. It also leaves the original roofing manufacturer's warranty fully intact.
Asphalt Shingle Roofs
Asphalt shingles dominate the residential and light commercial markets. They require a more invasive, careful approach.
Evaluation: This surface demands traditional penetrating attachments. Installers anchor these directly into the wooden rafters below the decking.
Risk Mitigation: You must utilize robust metal flashing. Pair this flashing with EPDM rubber gaskets. EPDM provides exceptionally high pull-out resistance and withstands intense UV exposure. Always apply commercial-grade sealants around the penetrations to guarantee zero moisture ingress.
Flat & Low-Slope Roofs (TPO/EPDM)
Commercial flat roofs present unique engineering challenges. You typically choose between ballasted and hybrid installations.
Evaluation: Ballasted systems use heavy concrete blocks for stability. They avoid membrane punctures entirely. However, they require a rigorous structural payload analysis to ensure the building can handle the weight. Hybrid setups combine minimal roof penetrations and lighter ballast. They offer the best stability in high-wind zones.
Performance Note: Incorporating tilted brackets onto a flat roof improves thermal ventilation. Better airflow reduces heat degradation on the panels. However, a steeper tilt angle heavily increases wind resistance, requiring more ballast or stronger anchors.
Material Specifications and Component Compatibility
A standard mounting array is only as reliable as its weakest fastener. Environmental exposure will degrade inferior metals rapidly. Selecting the right alloy prevents structural collapse and costly maintenance.
Base Material Selection
The primary racking structure must resist daily moisture, salt, and industrial pollutants.
Material Type | Key Characteristics | Best Use Case |
Aluminum (AL6005-T5) | Lightweight, naturally rust-resistant, highly workable. | Industry standard for most residential and commercial roof arrays. |
Zinc-Aluminum-Magnesium (ZAM) Steel | Self-healing coating, superior resistance to chlorides and ammonia. | High-corrosion environments (coastal zones, heavy industrial parks). |
Hot-Dip Galvanized (HDG) Steel | High tensile strength. Requires exact minimum coating thickness (≥ 65μm). | Large commercial projects requiring massive structural load capacities. |
Module Compatibility
Mounting hardware must physically match the solar panels. Mismatched gear damages the equipment.
Panel Frame Constraints: Module clamps must precisely match panel frame thicknesses. Industry standards typically sit at 30mm, 35mm, or 40mm. Using a 35mm clamp on a 30mm frame creates looseness, leading to vibration damage.
Clamping Zones: Every solar panel has designated "green zones" for clamping. Fastening outside these manufacturer-approved areas voids the module warranty. It also induces severe micro-cracking across the silicon cells under heavy snow or wind loads.
Hardware Integration
Stainless steel (SUS304) fasteners are non-negotiable. Lower-grade steel bolts will rust, freeze, and snap over a 25-year lifespan. Installers must adhere strictly to torque specifications. Using calibrated torque wrenches for DIN933 or DIN912 bolts prevents thermal expansion failures. Over-tightening crushes panel frames, while under-tightening allows panels to slide.


Structural Compliance, Wind Loads, and Fire Codes
Bypassing local engineering codes creates massive liability for property owners, EPCs, and installers. Regulatory compliance ensures the roof solar mounting setup survives extreme weather events and protects emergency responders.
Load and Wind Engineering
Many building owners worry about roof collapse. In reality, a well-engineered average array adds roughly 2.5 to 2.7 lbs per square foot of dead load. Most modern roofs easily handle this weight.
The greater threat is wind uplift. Air moving over the panels creates a vacuum effect. Hardware must carry UL 2703 certification. This critical standard tests both electrical grounding continuity and mechanical load resilience. Quality systems are commonly engineered to withstand 90 to 120 mph wind events.
Fire Safety & Setbacks (IBC/NEC)
Fire safety dictates where you can physically place the racking on the roof. The International Building Code (IBC) and National Electrical Code (NEC) outline strict rules. Fire codes typically mandate a minimum 3-foot clearance pathway at the roof ridge and edges. This setback allows emergency smoke ventilation. It also provides firefighters a safe walking path if they must access the roof during a blaze.
Animal & Debris Mitigation
Rooftop solar arrays create sheltered habitats. Birds, squirrels, and rodents frequently nest beneath the panels. You should integrate array edge screens, often called critter guards, during the initial deployment. These sturdy wire meshes prevent nesting. They also prevent costly wire damage caused by animals chewing through insulation, ultimately protecting the system’s electrical integrity.
TCO, Cost-per-Watt, and Installation Efficiencies
Evaluating the true Total Cost of Ownership (TCO) requires looking beyond the initial hardware invoice. You must factor in labor hours, shipping logistics, and maintenance predictability.
Baseline Cost Expectations
Mounting hardware represents a highly efficient CAPEX allocation. Roof racking generally accounts for $0.15 to $0.30 per watt. This fluctuation depends on roof complexity, tilt requirements, and material grade. Even at the higher end, investing in premium racking pays off by preventing catastrophic system failures.
Labor-Saving Innovations
Labor often eclipses material costs in modern solar deployments. Therefore, hardware manufacturers now focus heavily on installation speed.
Rail-Less Systems: These configurations are gaining significant market share. They eliminate the need for heavy, cumbersome rail shipments. This reduces freight costs. More importantly, rail-less designs accelerate installation times by 30-40%.
Pre-assembly: Premium vendors ship components partially assembled. Pre-assembled clamps and integrated grounding lugs reduce time spent on a hot, dangerous roof. They also mitigate the risk of dropped or lost fasteners on site.
Thermal ROI
The physical spacing of the mounting system directly impacts energy production. Flush-mounted systems must retain a 2 to 4-inch gap beneath the array. Proper airflow lowers module temperatures. Solar panels lose efficiency as they heat up. Maintaining this cooling gap prevents the standard 0.4-0.5% accelerated annual heat degradation. Over 25 years, protecting this thermal efficiency preserves thousands of dollars in energy generation.
Procurement Criteria: Vetting Suppliers and Engineering Validation
For commercial buyers and EPCs, a vendor’s engineering support is as important as the metal itself. Purchasing generic hardware blindly invites project delays and failed inspections. Use this framework to vet potential suppliers.
Demand Design & Simulation Proof: Reputable suppliers do not just sell metal brackets. They must provide site-specific CAD layouts. They should also supply verified wind and snow load simulation reports prior to purchase. These documents prove the hardware will survive local weather conditions.
Validate Warranty Standards: Look for a baseline of 10 to 25 years for structural warranties. Read the fine print to ensure the warranty covers environmental degradation and structural fatigue, not just factory defects.
Audit Logistics & Packaging: Poor shipping ruins good hardware. For international or bulk procurement, mandate export-grade, stackable packaging. Vendors should use reinforced wood pallets or robust foam boxes. This prevents structural bending or microscopic thread damage to fasteners during long transit periods.
Conclusion
The right roof mounting architecture secures your 25-year energy asset, minimizes roof liabilities, and streamlines deployment. Bypassing engineering standards for slightly cheaper hardware inevitably leads to voided warranties and dangerous structural failures.
Before comparing panel wattages, audit your roof structure. Identify the material, measure the available space, and assess the load-bearing capacity. Request structural spec sheets, UL 2703 certifications, and load simulations from shortlisted mounting vendors. By enforcing these strict procurement standards, you establish a safe, compliant, and highly profitable baseline for your solar project.
FAQ
Q: Will a solar panel mounting system void my existing roof warranty?
A: Not if matched correctly. Non-penetrating clamps (for standing seam) or properly flashed and sealed penetrations (approved by roofing manufacturers) preserve warranties. Always consult your roofing installer before attaching any solar hardware.
Q: Can my existing roof handle the added weight of solar panels?
A: Most modern roofs easily support the additional 2.5–2.7 lbs/sq ft. However, older roofs or flat roofs utilizing ballasted (concrete block) systems require a formal structural engineering review to verify payload capacity safely.
Q: When should I replace my roof before installing a solar mounting system?
A: If your asphalt or membrane roof is within 5–7 years of the end of its lifespan, replace it first. Removing and reinstalling a solar array to replace a roof later is highly cost-inefficient and slows ROI.
Q: What is the difference between standard and rail-less mounting?
A: Standard mounting uses horizontal metal rails to support panels. Rail-less systems attach panels directly to the roof mounts via specialized brackets, cutting down material weight, shipping costs, and installation time.